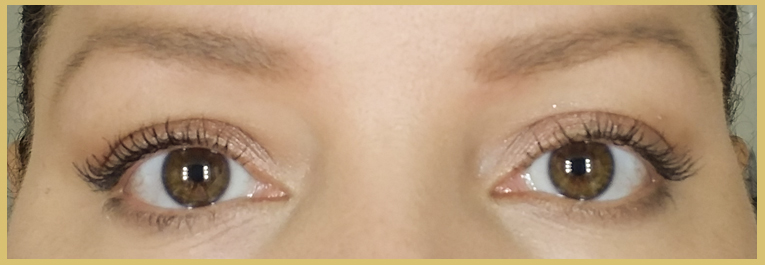
When I was 13 my mom took me in to get my eyebrows waxed for the very first time. Up until then, my older sister Tiffany had usually tweezed them for me. She usually “cleaned up” my barely there dark blonde eyebrows leaving me with a pretty decent shape. I insisted that I wanted to try waxing since all my junior high friends were doing it at the time. So we went in and the lady who waxed me forever changed my mind about it.
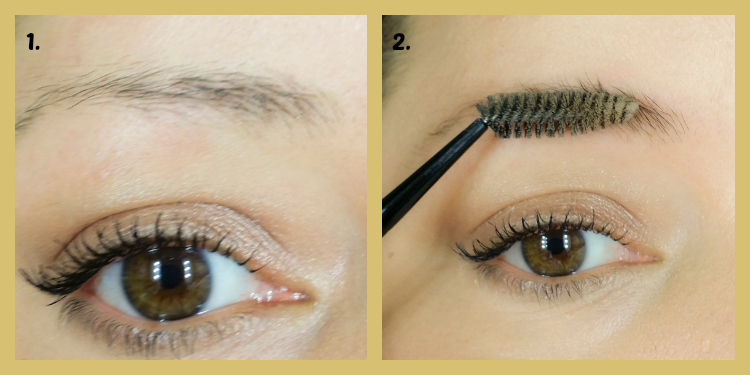
She destroyed my shape and gave me “chola” eyebrows. For those of you who don’t know what chola means, it is a reference to female gang members of the west coast, whose eyebrows are usually shaved off completely and then penciled in super thin with a black pencil or tattooed, giving the oh-so lovely sharpie eyebrow effect. Mine were simply thin. Barely there to be exact. They were light to begin with and then horribly thin.To add insult to injury, I had never experimented with filling them in because I was–well, 13. I went home in tears and vowed to never wax again. The worse part is that it took about 8 months for the eyebrows to “sort of” come back in and they were truly never the same. Till today, they remain looking sparse and over tweezed.I’ve since mastered the art of creating my eyebrows everyday and have gone through many different styles including drag-ish looking ones back in the 90’s. With all things 90’s making a hellish comeback including Instagram’s own “eyebrows on fleek”, which are drag inspired, super drawn on eyebrows, I’m on a mission to teach women to create natural-looking, soft, face-framing eyebrows that look like the real deal. Eyebrows NOT on fleek, so to speak. Not only is the trend harsh and a bit cartoony, the expression “on fleek” makes my stomach turn twice. What the hell does that even mean!?If you cringe at the expression “on fleek” and want to learn how to fill in your over tweezed eyebrows, keep on reading.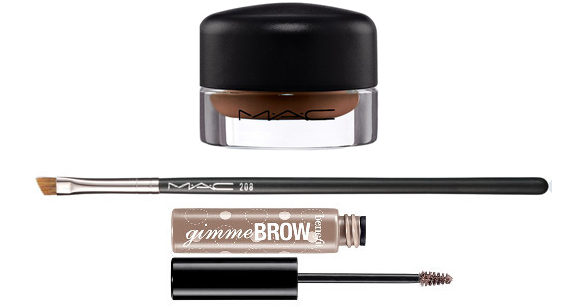 Steps 1-2-Begin choosing your product of choice. I am using MAC Fluidline Brow Gelcreme in Dirty Blonde. I like it because it is long lasting and has a powder finish. You can use a pencil or an eyebrow powder if that is your preference. Also, make sure to go one shade lighter than your natural hair color which is usually the most visually flattering. The only exception here is if you’re platinum blonde, where darker eyebrows usually look better. Next, brush your eyebrow hairs up using an eyebrow brush. This helps to get a clear view of all your “bald” spots that will require filling in.
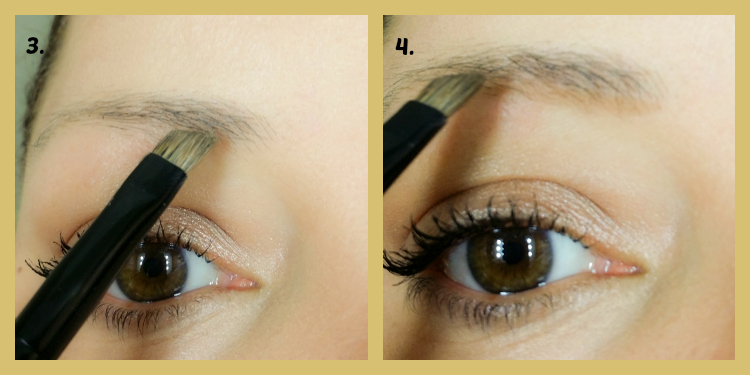
 Steps 3-4- Next, start adding definition by making short, feathery strokes with a brow brush. I love the MAC 208 Angled Brow Brush because it is nice and stiff. These strokes should look like hairs not a harsh line. Continue making short strokes until you’ve reached a desired shape.
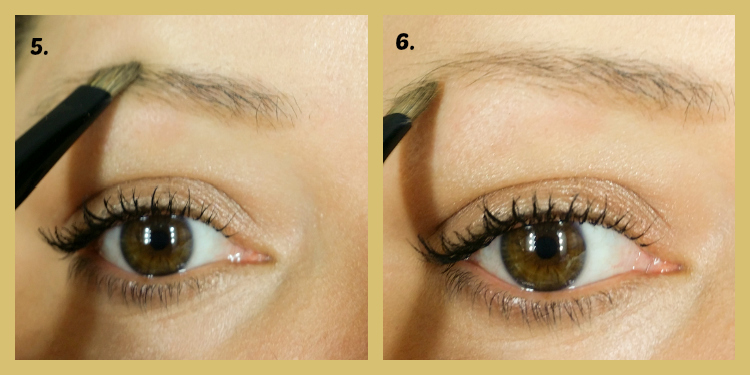
 Steps 5-6- Start to create your arch. The best way to determine where the highest point of the brow should be is to take a brush and measure from the tip of your nose across to the middle of your eye’s iris. This will give you the most flattering arch placement. The arch will help my eyes look slightly lifted and more open. Elongate the “tail” of the brow slightly to create symmetry.
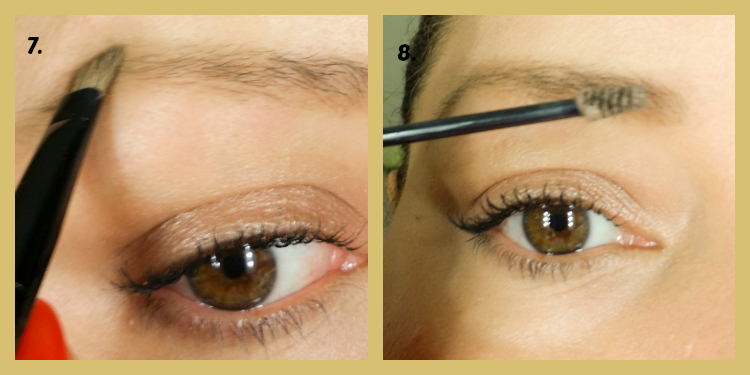
 Steps 7-8- Continue shaping the arch until you’ve reached a desired shape. The key is to take short strokes to create the effect of hair and add definition. Set with an eyebrow gel to lock in that shape and keep your hairs in place. I’ve chosen Benefit’s Gimme brow in Light/Medium because this product deposits small fibers that create the look of hair, but you can also use a clear one.
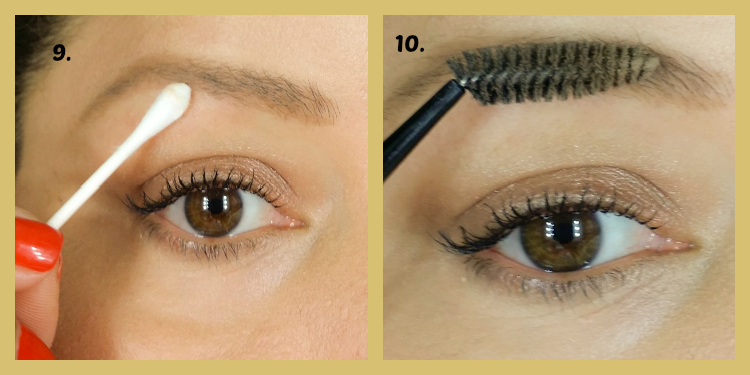
 Steps 9-10-Once you’ve achieved your desired shape, take a q-tip and clean up any areas that may need correcting. The goal here is not super sharp brows, just nicely shaped. Run a clean mascara wand or brow spooly (step 10) over the brows to further blend any overdrawn areas. Doing this will give you the most natural looking brows.
Here is the final look. If you look closely, you will see what seem to be brow hairs, not drawn on heavy brows. This is the effect I like for my brows. It looks natural and soft. What are your favorite brow looks?